
Embroidery Digitizing
Flat Embroidery vs. 3D Puff Embroidery: Which Is Right for Your Design?
By Tajima Digitizer · October 1, 2026
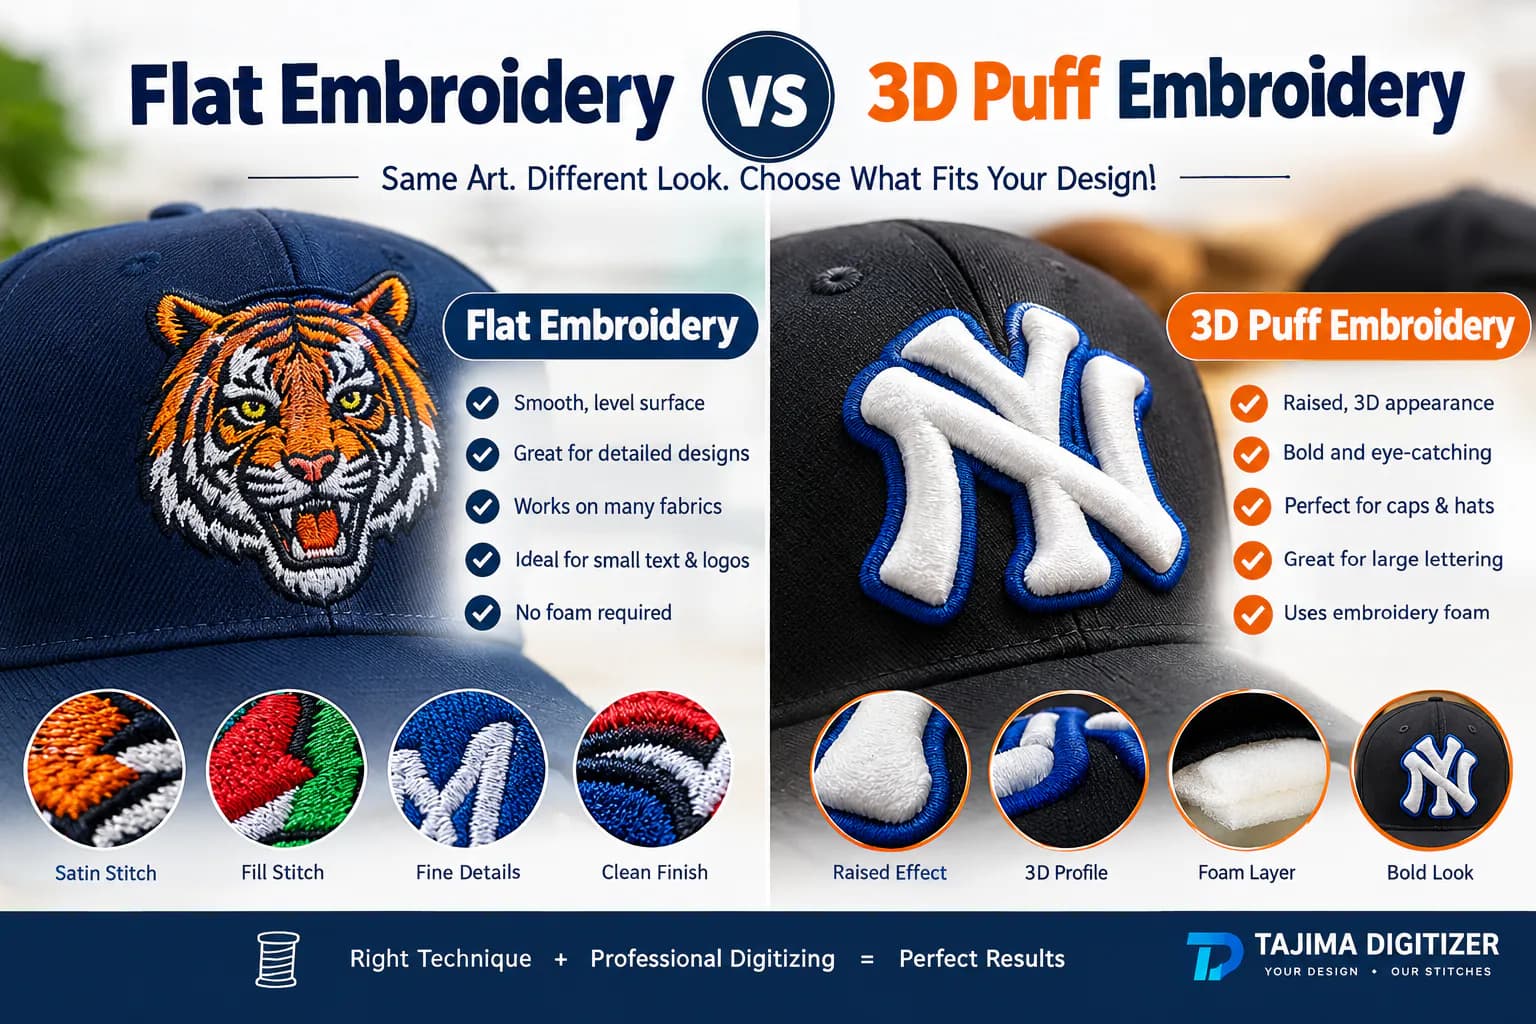
Flat Embroidery vs 3D Puff Embroidery: Which to Choose
A bold cap logo can look great in raised stitches. Add a tiny tagline beneath it, though, and that detail may need a different approach.
When comparing flat embroidery vs 3D puff embroidery, start with your design at its final size. Choose flat embroidery for fine details and small text. Choose 3D puff for bold shapes that you want to raise above the fabric. You can also combine them in one logo.
The right choice depends on the artwork, garment, and finish you want. This guide helps you weigh those factors before you order a stitch file or start production.
Flat embroidery vs 3D puff embroidery at a glance
Factor | Flat embroidery | 3D puff embroidery |
|---|---|---|
Appearance | A low profile with visible thread texture | Raised areas with a fuller, rounded or firm shape |
How it works | Stitches cover the fabric without puff foam | Stitches cover foam placed above the fabric |
Best design features | Fine lines, small text, and detailed shapes | Bold letters and broad, simple shapes |
Common uses | Polo logos, uniforms, jackets, bags, and caps | Cap fronts, large initials, and bold brand marks |
Stitch types | Satin, fill, running stitch, and other treatments | Often satin columns designed to cover the foam |
Main limitation | Tiny details still need enough space to sew clearly | Narrow strokes and tight gaps can be difficult to raise cleanly |
File preparation | Settings matched to the artwork and fabric | A stitch plan made for foam, coverage, and edge closure |
Both methods can use several thread colors. The shape and size of each element help decide which treatment suits it.
What is flat embroidery?
Flat embroidery places stitches close to the fabric surface. It gives a logo thread texture without adding a foam layer for height.
A digitizer turns the artwork into sewing instructions. They choose how each part will stitch, including its direction, density, and sewing order.
The main stitch types serve different jobs:
Satin stitch covers letter strokes, borders, and narrow shapes.
Fill stitch, often called tatami, covers larger areas of color.
Running stitch forms fine lines, light outlines, and travel paths.
Underlay sits beneath the visible stitches. It supports the design and helps the top thread cover the fabric evenly.
Flat embroidery is a practical choice when the logo needs several kinds of detail. A company name, fine outline, and small symbol can each use a different stitch treatment.
When flat embroidery works best
Use it for designs whose meaning depends on readable text or clear detail. Common examples include a name on a work shirt or a logo on a polo.
It also suits many cap designs. A detailed badge may look clearer in flat stitches than in an all-puff version.
Check the artwork at its actual size. Very thin strokes, tiny letters, and narrow gaps may still need changes. Thread needs room to form a clean shape, even when no foam is involved.
What is 3D puff embroidery?
3D puff embroidery uses foam beneath the top stitches to create height. The needle pierces the foam as the design sews. Once stitching ends, the unused foam is removed.
The foam remains inside the raised areas, giving letters and shapes a fuller profile.
Purpose-made embroidery foam comes in different types. For example, Madeira's E-Zee foam includes regular and firm 3 mm options. Their firmness affects the finished look. Select the foam with the stitch plan and test the result together.
When 3D puff works best
Puff suits broad letter strokes, large initials, and simple marks. These shapes give stitches enough room to cover the foam and form clear edges.
Structured caps are a common use. Stable fabrics such as twill, denim, and canvas can also support raised work. The item still needs suitable backing and hooping.
Watch for thin lines, small enclosed spaces, and sharp changes in stroke width. Those features may need a flat treatment or an approved change to the artwork.
For a logo with several parts, decide which areas should be raised. Adding height to one strong feature can be enough to create the look you want.
Which method fits your logo and garment?
Use the smallest design feature as your first test. Then check the material and placement.
Project | Useful starting choice | Why |
|---|---|---|
Polo logo with a company name and tagline | Flat embroidery | Keeps the focus on clear text and detail |
Structured cap with bold initials | 3D puff embroidery | Broad strokes can support a raised finish |
Cap logo with large letters and small text | A mix of flat and puff | Raises the main letters while keeping the small text readable |
Fine line drawing on a bag | Flat embroidery | Allows a light stitch treatment for the outlines |
Broad mark on a sturdy jacket | Flat or puff, based on the desired look | Both may work after checking the shape, support, and sample |
Example: one logo, two products
Imagine a brand logo with thick initials and a small tagline. The brand wants it on caps and staff polos.
For the cap, raise the initials with puff embroidery. Keep the tagline flat. This gives the main mark height while preserving the smaller words.
For the polo, a flat version can keep the whole design readable with a lower profile. Test the design on the chosen shirt fabric.
Keep separate files for the two products. Each needs settings and a sewing path that suit its placement.
Fabric support matters for both
Stable woven fabric behaves differently from a stretchy knit. Match the backing, density, and underlay to the garment.
Madeira's backing guide explains why knits often need lasting cut-away support. Stable woven fabrics may suit tear-away backing, depending on the design.
For puff, the foam creates the raised effect. Backing supports the fabric underneath. Plan for both when choosing the materials.
Why puff embroidery needs its own digitizing
A puff design needs stitches that cover the foam and define its edges. A file made for flat embroidery may need changes before it can sew well over foam.
Three areas deserve close attention.
1. Satin coverage and open ends
Satin columns are a common choice for puff. Their stitches cross the shape and wrap the foam along the sides.
At an open end, those stitches may leave foam exposed. Capping stitches close that area. A digitizer plans where the caps belong and how they join the rest of the shape.
Madeira's 3D embroidery guide explains the use of satin columns and end caps. This edge treatment is one reason a puff file needs more than a change in density.
2. Density and pull compensation
The stitch plan needs enough coverage to hide the foam and help separate the excess after sewing. More stitches alone will not fix a poor shape or an open edge.
The foam also changes how the satin column behaves. Pull compensation helps account for the width lost as stitches pull inward.
Wilcom's guidance on puff settings highlights wider satin columns, extra pull compensation, and capping where needed.
Use the chosen foam and fabric in a test stitch-out. A single density value will not suit every combination.
3. Underlay and sewing order
Underlay supports the fabric, but its position matters when foam is involved. Madeira's process sews the foundation before placing the foam. Stitches that compress the raised area can reduce the loft.
For a mixed design, a common sequence is to sew the flat areas first. The machine then stops so the operator can place foam over the puff section. The raised areas sew next, and the operator removes the excess foam.
Madeira's foam instructions describe that stop-and-place workflow. The final sequence still needs to suit the logo and garment.
Compare cost, care, and the finished sample
Puff adds foam placement and cleanup to the production process. It can also require more work on the stitch file. That may affect the quote, but the design and order details set the price.
Ask for both options using the same artwork, finished size, garment, and quantity. Compare the total scope, including digitizing, samples, revisions, and finishing.
A complex flat logo may take more work than a simple puff mark. The style name alone cannot tell you the cost.
Care needs also depend on the garment, thread, foam, and finished stitching. Confirm the maker's care instructions before ordering. For items that will be washed often, approve a sample through the planned care cycle.
What to check in a stitch-out
Inspect the sample after it comes out of the hoop. Check these points under good light:
Can you read the smallest text?
Do borders meet their fills cleanly?
Does the fabric lie smoothly around the logo?
Are the raised shapes even and fully covered?
Is foam visible at corners or letter ends?
Are gaps inside letters still open?
Does the finished design feel right on the item?
A software preview helps you review the stitch path. A sewn sample shows how the materials behave together. Ask which kind of preview you are receiving before approving production.
What to send your digitizer
Give the digitizer enough detail to plan the right file:
Your clearest logo artwork.
The finished width and height.
The garment type, fabric, and placement.
The areas you want flat, raised, or combined.
Your machine model and required file format.
Thread colors and foam details, if already chosen.
Machine formats such as DST or PES can contain sewing instructions for either style. The stitch plan, materials, and production steps create the finish.
If you need several sizes or garments, say so at the start. Changes in size can affect small lettering, satin widths, and foam coverage.
Frequently asked questions
Can every logo be made in 3D puff embroidery?
Some logos need changes first. Thin strokes, tiny words, and tight gaps can be hard to raise cleanly. A digitizer can assess which parts suit puff and which should stay flat. Approve any artwork changes before sewing.
Can flat and puff embroidery be combined?
Yes. A mixed design can raise the main letters while keeping fine details flat. The file needs a planned sequence and a stop for foam placement where required.
Can 3D puff embroidery be used on shirts?
It can be used on suitable garments, but test the actual fabric and placement. Foam and dense stitching add bulk. Check support, comfort, and care needs before approving a full shirt order.
Can I use the same file for flat and puff embroidery?
Have the file reviewed for each method. Puff may need different satin coverage, compensation, capping, and sewing order. Keep clearly named versions so the operator knows which process to use.
Choose the finish that suits your design
Flat embroidery gives detailed logos and small text a practical starting point. 3D puff gives broad shapes a raised finish. A mixed design can bring both effects to the same cap or garment.
View our custom embroidery digitizing services or 3D puff digitizing service. To get started, request a quote from Tajima Digitizer with your logo, size, garment, and desired finish.